Super Bridge Project

In Term 2 we designed a super bridge out of wood. The bridge was 8 feet long and we did it in groups, my group consisted of Zack Gordon, Chris Salvo, and Jacob Hultman. The picture shown to the left is a picture of our box based bridge before we tested. We used pink foam in the middle and bottom of our bridge to resist some of the pressure that we put on the bridge during testing. I would say that even though our bridge was destroyed on one end that the pink foam was a success because it did absorb a lot of the pressure and kept the bridge from breaking. However, our goal was to create an 8 foot super bridge that was under 10 pounds and 7 inches wide. The maximum height on this project was 1 foot, the bridge had to hold every team member.
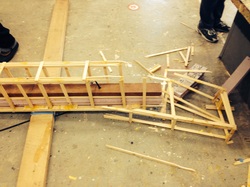
The picture to the left is a picture of our bridge after the testing day. Our bridge resisted a lot of the weight that we put on it and I believe it was a success because the bridge only broke on the side that before testing had cracked a bit because the glue wasn’t completely dry. Our bridge weighed around 8 pounds.
Cement Mold Project
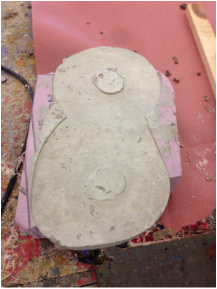
In this project we were asked by Mr. Ramos to create our own personal cement mold of whatever we chose to do. I play hockey and baseball here at the high school, I’ve been varsity hockey for 2 years and JV baseball for 2 years. During all 4 seasons I have been #8, which is my favorite number. First, I took a square piece of pink foam and I used the jig saw to create an 8 in the pink foam. I then put the thinner piece of pink foam under to stop the cement from seeping through the bottom. I mixed cement and poured it into the 8 creating a cement mold of the number 8.
Wind Turbine Project
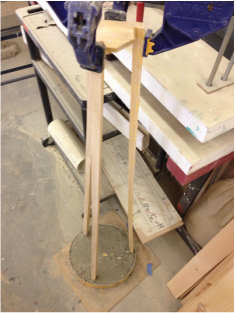
This project we are currently in the middle of doing. It is our wind turbine project, my group consists of Brandan Ciullo and Zack Gordon. We ripped wood using the table saw and then glued three pieces together to create the base which is in the shape of a triangle. Once we were done with those and they were done drying, we made a circular cement base to put those into for more support when the wind is blowing. As the days go on we will begin to create triangles that start from the base and go all the way to the top of the turbine. At the top we will have our propeller that we made along with a motor, our goal for this project is to achieve the highest velocity in the class.
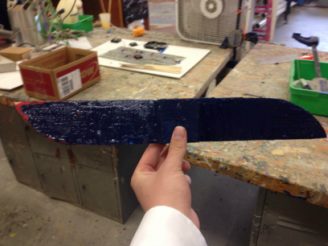
This is the propeller that we will be using in our wind turbine. We had to use the “cheese grader” as Mr. Ramos calls it to shave down the sides in order to create to wings and more aero-dynamics in order to make the propeller spin faster and create more velocity. I believe that our propeller is a very big success because it goes very fast when we put it in front of the fan. We painted it at first red, white, and blue. However, we changed it to strictly blue to represent our school.
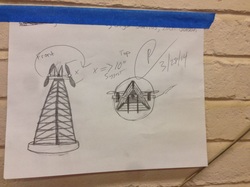
This was the beginning step to our wind turbine project and it was to draw out a model of what we wished our wind turbine to look like at the completion of our project. As you can tell we created a triangular base with triangles going up and progressively becoming smaller. We chose the triangle base because it has been proven that triangles are the strongest shape. If you were observant and saw different bridges the majority of them are triangle designs. The left side is a front view while the right side is a top view of our drawing model.
Aquaponics and Hydroponics Systems
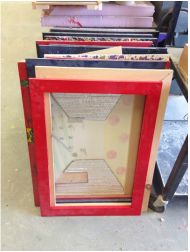
Our goal was to create a hydroponic system design using large poster board and using wood to create a frame around it. These are just examples of what some of them looked like. My frame consisted of purple, blue, and red and my hydroponics system used watermelon and two different kinds of fish. I met my goal with this project along with my partners, Zack Gordon and Brandan Ciullo.
This picture shows a project that we do that takes all year. At the beginning of the year we use wood shavings and a seed to try and create a plant. We put the plant up against the window sill in order for it to achieve sunlight and the water comes through on a system that was created by Mr. Ramos. We use fish poop in our aquaponics system which is why the fish are in the water tank. My goal was achieved because of the year my plant has progressively gotten bigger.
Instrument
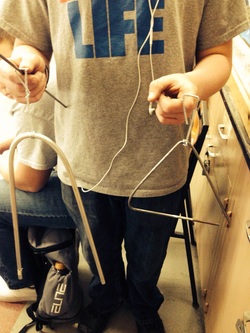
In this project our goal was to create a beautiful sound out of materials that we had in class. This is my instrument along with Jacob’s. We both created a triangle sounding instrument out of metal pieces that we bent into a shape. We used another metal piece as the tool to hit the triangle to create beautiful sound that Mr. Ramos wanted us to create. I believe my project was a total success.
Basics of Engineering Design
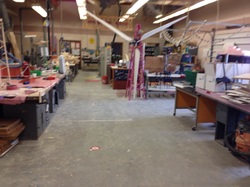
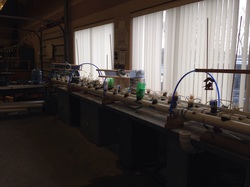
This is a picture of the Engineering Design lab in which we are in every day. The lab is where we create all of our projects. To the left you can see the work benches and different projects that are scattered. To the right you see where we store our completed projects. There are so many different machines to cut wood, sand, etc. This lab is where all of our QUALITY projects are made.
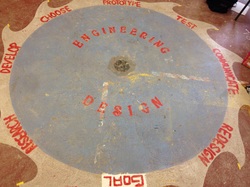
This picture shows the steps of the engineering design process. The first step is goal, which is what we set at the beginning of the project and is what we want our project to be. The rest of the steps are as followed: research, develop, choose, prototype, test, communicate, and redesign. Those are the 8 steps in which we follow for every single project.
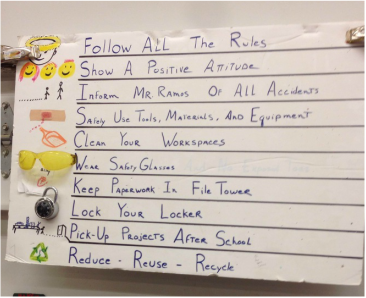
These are the rules that we must follow when we are in Mr. Ramos’ lab, if you don’t follow these rules the consequences are as followed: Minus points in your grade book, you must stand on either the nut or the finish line and apologize to Mr. Ramos for breaking his rules. Engineering Design is a very fun class for those who follow the rules!
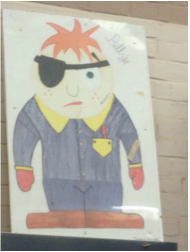
This is Billy, Billy is the student Mr. Ramos models on what not to do. Whenever someone does something wrong he will call them a “Billy”. Billy is a student from the past who did not follow directions and was injured in Mr. Ramos’ lab. Don’t be a BILLY!!!
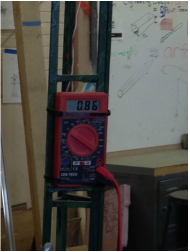
This picture shows the voltage that my Wind Turbine had during the testing. My turbine was created with my groupmates Brandan and Zack. Our turbine did not win the remote controlled helicopter however I still feel as if my team was successful in achieving our goal. We received .86 voltage and only had one motor attached.
Our goal was to create a wind turbine to have the most voltage possible. My turbine was very well put together and worked good.
Our goal was to create a wind turbine to have the most voltage possible. My turbine was very well put together and worked good.
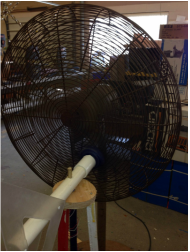
This picture shows my wind turbine in full speed. We put a 3 speed fan in front of our wind turbine and then attached the turbine to the tester. The number that our turbine received was the amount of volts that we got. We used a PVC pipe and within it created the wires that ran through it and down my project. We painted the base of our turbine red, white, and blue. We used a "fin" on the back of our project to catch the wind.
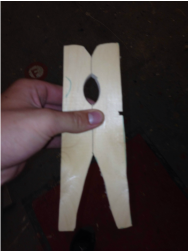
This was the last project of my Engineering class except for the final assignment. Our goal was to create a super clamp out of wood and a metal rod. I was successful with my project cause I created one. This picture was the assignment at around 50% completion. I believe this project was fairly easily and should be kicked up a notch for future years. This assignment was traced from Mr. Ramos' super clamp.
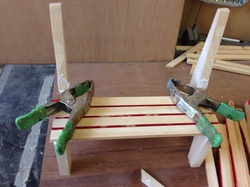
My final project as an engineering design student was to do a #8 on Mr. Ramos' park bench. This meant we needed to redesign it into our own creation. This picture represents my project at the halfway point of 110 minutes to create my bench. I ripped wood on the table saw and then cut the pieces down to 1 foot long. I created the "legs" of the bench using the bandsaw and the sander. I used glue to keep the 1 foot pieces onto the legs in order for my project to look like a bench.
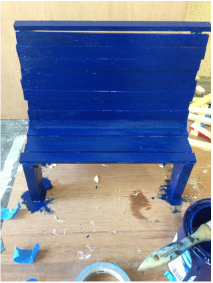
This is my project at the end of the time given to me to create the bench. I finished gluing down my 1 foot pieces of wood onto the legs of the bench. I painted my bench blue because I am a true raider and the raiders are represented by the colors blue and white. I achieved my goal in this project which was to successfully create a bench in 110 minutes. This is my final project.
Engineering Design
My time has an Engineering Design student has come to an end and throughout the year I learned a lot about the aspects of creating things and setting goals. The motto that we lived by all year was "Anything is possible" which is something that we can carry on with us throughout our lives. We had many different projects during the year and I believe that I never failed to meet my goal. I am very glad that I took this class and wish that I could take it again, you learn a lot from it and it was a very fun class to be a part of. It is a break away from your sit down and listen classes, it gives you the chance to work by yourself or as a team with "hands-on activities". I recommend this class to anyone who has not yet taken it! Mr. Ramos is the best!
